SAP UI5 Parameterized Routing: How to Navigate Between Views and Pass Data in Fiori Apps
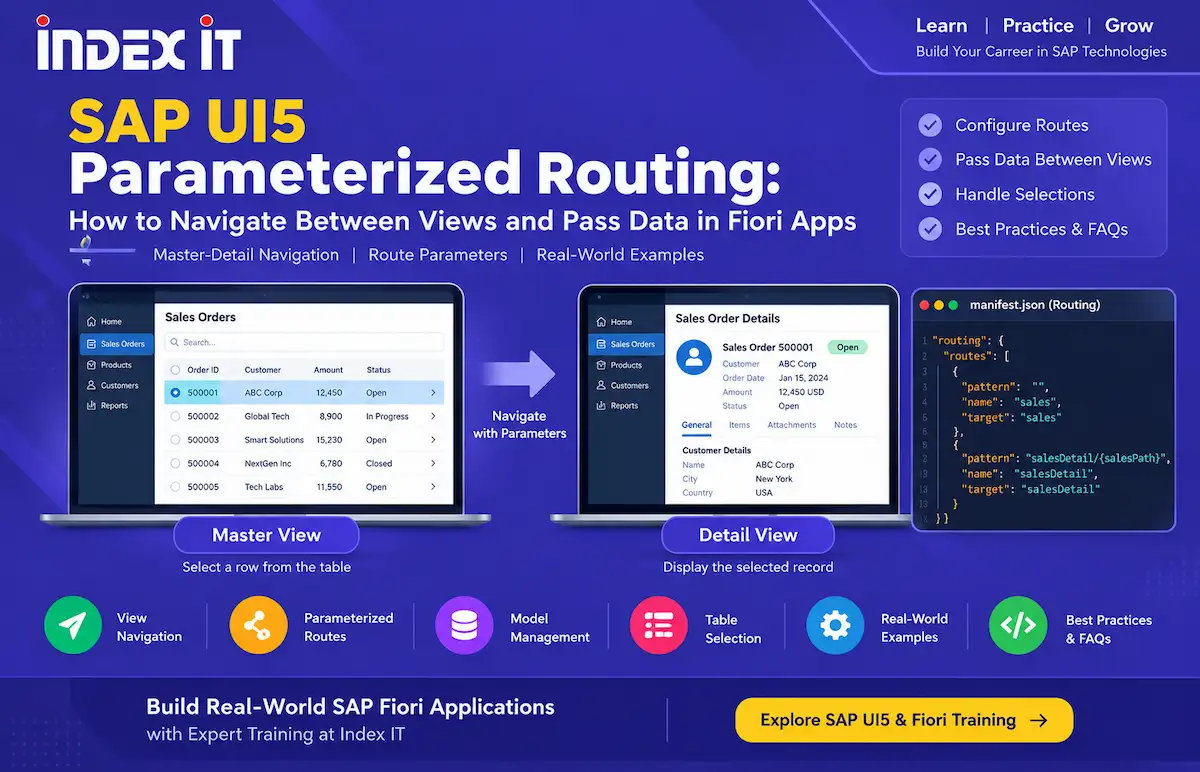
If you've built more than one screen in an SAP UI5 or SAP Fiori application, you've hit a familiar problem. How do you move from one view to another and carry meaningful data with you? A master list only works if tapping a row opens the right detail record — not just "a" detail screen, but the correct one, populated with the correct data.
Parameterized routing in SAPUI5 solves exactly this. In this guide, we'll walk through how routing works, how to configure manifest.json for plain and parameterized routes, and how to capture the row a user selects in a table. We'll also cover how to pass that selection to a detail view, including the difference between setting a model on a view and setting it on the component. Along the way, we'll flag the mistakes that most commonly trip up developers new to this pattern.
This article is part of Index IT's SAPUI5 and Fiori development resources. If you're looking for structured, practical training alongside these concepts, explore our SAP UI5 and Fiori Training in Hyderabad.
What Is Routing in SAPUI5?
Routing controls navigation between views inside a single-page application. SAPUI5 doesn't reload the browser or juggle multiple HTML pages. Instead, a client-side router swaps views in and out of a container based on a URL hash — the part of the URL after the # symbol.
SAPUI5 supports two broad approaches to routing:
- Plain routing — you move from one view to another with no data attached to the URL. The router only needs to know which target to display.
- Parameterized routing — you move from one view to another and carry a piece of information, such as a row index or key, in the URL pattern itself. The receiving view then uses that parameter to know exactly what data to display.
Parameterized routing powers the classic Fiori master-detail pattern: a list or table on one screen, and a detail page that reflects the user's selection. Most real-world Fiori apps rely on this pattern — sales order lists, purchase order approvals, employee directories, and more.
If you're working with SAPUI5 tables and data binding, understanding SAPUI5 aggregation binding, models, and OData data can also help you understand how records are connected to controls and views.
Where Routing Is Defined: manifest.json
Every SAPUI5 app defines its routing configuration in the routing section of manifest.json, the application descriptor file. This file holds pure configuration; it doesn't execute logic. The router consults it whenever a navigation is triggered.
A simplified routing configuration looks like this:
"routing": {
  "config": {
    "routerClass": "sap.m.routing.Router",
    "viewType": "XML",
    "async": true
  },
  "routes": [
    {
      "pattern": "",
      "name": "sales",
      "target": "sales"
    },
    {
      "pattern": "salesDetail/{salesPath}",
      "name": "salesDetail",
      "target": "salesDetail"
    }
  ],
  "targets": {
    "sales": {
      "viewName": "Sales",
      "viewLevel": 1
    },
    "salesDetail": {
      "viewName": "SalesDetail",
      "viewLevel": 2
    }
  }
}
A few points stand out here:
- pattern shows up in the browser's URL hash. The landing view usually has an empty pattern, since no data has been selected yet.
- {salesPath} in curly braces is a route parameter. This turns an ordinary route into a parameterized route by reserving a placeholder in the URL for a value you'll supply at navigation time.
- Every route maps to a target, and every target maps to a view. This separation lets multiple routes reuse the same target when needed.
Mandatory vs. Optional Route Parameters
Once you add a parameter to a pattern, SAPUI5 gives you two ways to declare it, and the difference matters:
| Parameter type | Syntax | Behavior |
|---|---|---|
| Mandatory | salesDetail/{salesPath} |
The router blocks navigation and throws a routing error if you don't supply the parameter. |
| Optional | salesDetail/:salesPath: |
Navigation succeeds even with no value — the segment stays blank. |
This distinction acts as a safeguard, not just a style choice. If your detail view has no meaning without a selected record, make the parameter mandatory. The router will throw an explicit error instead of silently opening a broken or empty detail screen, and that error is far easier to debug during development.
Step-by-Step: Triggering Navigation from the Controller
Once you define the routes, you trigger navigation from a controller method. Typically, you attach it to a button's press event or a table's selection-change event. Follow these steps:
1. Access the Router
The controller doesn't expose the router directly. You first need the owner component, and from there, the router:
var oRouter = this.getOwnerComponent().getRouter();This works because the component loads and interprets manifest.json — where routing lives — not the individual view or controller.
2. Get the Selected Row from the Table
Before you can navigate with data, you need to know what the user selected. SAPUI5 tables expose two related but functionally different methods for this:
- getSelectedItem() — returns a single selected item, or
nullif nothing is selected. If multi-selection is enabled and the user selects several rows, this method still returns only the topmost one. - getSelectedItems() — returns an array of every selected item. Use this method whenever your table's selection mode allows multi-select.
Picking the wrong method for your table's selection mode causes one of the most common bugs at this stage. If you call getSelectedItem() against a multi-select table, the app silently ignores any selections beyond the first.
3. Add a Selection Guard
Validate that a selection exists before you attempt navigation:
onNavWithParameter: function () {
  var oTable = this.byId("salesTable");
  var aSelectedItems = oTable.getSelectedItems();

  if (aSelectedItems.length === 0) {
    return; // stop here — nothing selected, nothing to navigate to
  }

  var oSelectedItem = aSelectedItems[0];
  var sPath = oSelectedItem.getBindingContext().getPath();
  var sIndex = sPath.split("/")[1];

  this.getOwnerComponent().getRouter().navTo("salesDetail", {
    salesPath: sIndex
  });
}
4. Understand the Binding Context and getPath()
Each row in a bound table carries a binding context — a pointer into the underlying model at the exact position that row represents. When you call getBindingContext().getPath() on the selected item, it returns a model path such as /1. That number marks the index of the record inside the bound collection — for example, the second entry in a JSON model array.
You pass that extracted index into navTo() as the route parameter. It fills in {salesPath} in the URL pattern, and the detail view uses it to look up and display the correct record.
Global (Component) Models vs. Local (View) Models
This concept trips up more developers than almost anything else in multi-view SAPUI5 applications. Where you set a model determines which views can see it.
- this.getView().setModel(oModel) attaches the model only to the current view. Other views — including a detail view you're about to navigate to — can't access it and will read
undefined. - this.getOwnerComponent().setModel(oModel) attaches the model at the application (component) level. Every view in the app can then access it.
If your navigation flow depends on the destination view reading data from the source view, set the model at the component level. A model set locally on the originating view often causes a detail screen that loads successfully but appears empty — navigation works, but the new view can't find the model it needs.
As a rule of thumb: keep a model local if only one screen ever needs its data. Set it on the component if it needs to travel with the user across views — which is the norm in a master-detail scenario.
For developers who want to strengthen their practical SAPUI5 and Fiori development skills, Index IT provides SAP UI5 and Fiori training with hands-on project exposure.
Named vs. Unnamed OData Models
The same "where does this model live" question applies to OData models, with one added wrinkle: naming.
When an application consumes only a single OData service, developers often leave the model unnamed, and every binding in the app implicitly refers to it. But the moment your application needs a second OData service — for example, a sales service and a separate purchasing service — leaving both unnamed creates ambiguity. Neither the framework nor another developer reading your code can reliably tell which service a given binding points to.
Declare named models in the models section of manifest.json to fix this. Give each OData service, and each JSON model, an explicit identifier. From that point on, every binding in your XML views and controller code references the model by name, and you remove the guesswork about which data source is in play. This step becomes essential once an application grows beyond a single-entity, single-screen scope — which describes most real Fiori applications in production.
Real-World Example: Sales List to Sales Detail Navigation
Here's how a typical master-detail flow comes together:
- A Sales List view displays records in a table bound to a sales model, with multi-selection enabled.
- The user selects a row. The controller reads the selection with
getSelectedItems(), confirms a selection exists, and extracts the binding path withgetBindingContext().getPath(). - The controller calls
navTo()and passes the extracted index as thesalesPathroute parameter defined inmanifest.json. - The router resolves the pattern
salesDetail/{salesPath}and loads the Sales Detail view. - Because the sales model lives at the component level, the Sales Detail view can read it and use the passed index to display the correct record — for example, in an object header with populated attributes.
Countless standard Fiori apps rely on this same mechanism: a worklist or list report that feeds into an object page, filtered by whatever the user picked.
Common Mistakes to Avoid
- Using getSelectedItem() on a multi-select table. You'll only ever get the first selected row, and the app silently drops additional selections.
- Setting the model on the view instead of the component. Watch for a detail view that navigates correctly but renders blank or
undefinedfields — that's usually the cause. - Mismatching mandatory and optional parameters. Making a parameter mandatory when the view can be reached without one — or vice versa — produces unnecessary routing errors or a detail screen with nothing to show.
- Leaving multiple OData or JSON models unnamed. This works fine with one model, but it becomes a source of confusing bugs the moment you add a second one.
- Separating routes from targets incorrectly. A route without a matching target, or a typo between the two, fails silently or produces a routing error that's harder to trace than it needs to be.
Best Practices for SAPUI5 Routing and Data Passing
- Keep route patterns predictable and readable — they double as the app's URL structure, and that matters for deep linking and bookmarking.
- Reserve mandatory parameters for routes that mean nothing without a selection. Use optional parameters for routes that should still resolve gracefully with no data.
- Default to component-level (global) models for data that more than one view needs. Reserve view-level (local) models for screen-specific, throwaway state.
- Name your models as soon as an app has more than one data source. This step costs almost nothing up front and prevents ambiguity later.
- Always guard navigation logic with a selection check. This stops users from triggering a parameterized route with no underlying data.
- For table-based applications, understand how SAPUI5 aggregation binding and model data work together, because binding context and model structure directly affect how records are identified during navigation.
FAQs
What is the difference between plain routing and parameterized routing in SAPUI5?
Plain routing moves the user from one view to another with no data in the URL. Parameterized routing reserves a placeholder in the route's pattern, using curly braces in manifest.json, so a value — such as a record index — travels with the navigation and reaches the destination view.
Where do I define routes in a SAPUI5 application?
You define routes inside the routing section of manifest.json. The routes array holds URL patterns and names, and the targets object maps each route to the view it should display.
What's the difference between a mandatory and an optional route parameter?
A mandatory parameter ({paramName}) must have a value, or the router throws an error and blocks navigation. An optional parameter (:paramName:) lets navigation succeed even without a value.
Should I use getSelectedItem() or getSelectedItems() on my table?
Use getSelectedItem() for single-selection tables — it returns one item or null. Use getSelectedItems() for multi-select tables, since it's the reliable way to retrieve more than one selected row.
Why is my data undefined when I navigate to the second view?
You likely set the model at the view level (this.getView().setModel()) instead of the component level (this.getOwnerComponent().setModel()). A view-level model stays invisible to other views.
What is a binding context in SAPUI5, and why does getPath() matter for routing?
A binding context points to a specific position within a bound model. When you call getPath() on a selected row's binding context, it returns that position — for example, /1 — which you typically pass as a route parameter to identify the record on the next screen.
Do I need to name my OData or JSON models?
Not if your app uses only a single model. But once you introduce a second OData service or JSON model, name both to avoid ambiguous bindings across your views.
What's a practical, real-world use case for parameterized routing?
Think of the master-detail pattern: a sales list, purchase order list, or employee list where selecting a row navigates to a detail page pre-populated with that record's data. This pattern forms the backbone of many standard Fiori list-based applications.
Conclusion
Parameterized routing turns a collection of disconnected SAPUI5 views into a coherent, data-driven Fiori application. Learn how manifest.json patterns map to targets. Understand how mandatory and optional parameters behave differently. Extract a selected row's binding path correctly, and place your models where they need to live to survive the trip between views. Once you master these pieces, master-detail navigation becomes a repeatable pattern you can apply to list-to-object-page scenarios.
If you want to build these concepts through structured, practical learning, explore SAP UI5 and Fiori Training in Hyderabad from Index IT. The training covers SAP UI5, Fiori, OData integration, application development, and hands-on project work.